The Potty Proud Approach:
A Step-by-Step Guide to potty train your child fast!
About Our Approach
Welcome to the Potty Proud Approach, the comprehensive, step-by-step potty training system developed by the team at One Proud Toddler. In this guide, we explain how to potty train your child in three days.
At the outset, you should know that if your child is “in the zone” (i.e. between 20-and-30 months old), then it will generally take between two-and-seven days for him or her to grasp the foundational concepts of potty training. Realizing that not everyone has the flexibility to take up to an entire week away from work just to potty train, we developed the Potty Proud Approach to provide those parents who NEED to get this done in three days.
We do this by going day-by-day and even breaking those days into morning and afternoon tasks where necessary. We've also provided a "Course Correction" for those who experience training "hiccups" that can be used in the afternoon of Day ONE or morning of Day TWO just to keep things on track.
While the Potty Proud Approach is structured to allow for completion in three days, the steps we set forth can also be viewed as "phases" if you have the luxury of more time. In fact, we'd HIGHLY recommend giving yourself an extra day or even two for this process if you can. The extra time will allow you to extend each "phase" out by a day or so (if necessary), which can reduce pressure and enable you to make sure your child fully grasps the concepts you are trying to teach.
The Potty Proud Approach is comprised of the following sections:
| Section | Description |
|---|---|
| Getting Ready | Provides an overview of what you can expect to accomplish by the end of these three days, the equipment you'll need and helpful steps to take before you start training. |
| Day ONE: Lets Get Started! | Say goodbye to diapers! Your child will be naked from the waist down and you will be watching like a hawk ALL DAY to literally catch him or her in the act of "going" to then be RUSHED onto the toilet for teaching purposes. |
| Day TWO: Keep it Up! | This is essentially a continuation of Day ONE in the morning (practice makes perfect). In the afternoon, you'll introduce loose fitting pants and then a travel seat in preparation for Day THREE. |
| Day THREE: Going Out! | Today is all about showing your child that potty training does not stop at home. You'll be traveling to your favorite kid-friendly locations to practice using the potty outside the home. |
| All About Accidents | Accidents are PART of the plan. What's more, there is a reason for every accident. We explain how to handle accidents as well as common reasons for them and solutions you can employ. |
| What About Poop? | "Poop" training can seem tricky. We explain how to approach it and why it follows naturally from "pee" training. |
| Naps and Night Time Training | Naps and night time present distinct training challenges. We set out how to handle them. |
| The "Course Correction" | For those parents on a tight three-day schedule but who experience hiccups on Day ONE, this section sets forth a method for getting things back on track by the afternoon of Day TWO. |
| Odds & Ends | Good to know information, such as when to contact the doctor, helpful trouble shooting advice and how we developed the Potty Proud Approach. |
To assist with navigating it all, we've placed "Quick Click Table of Contents" like the one below at the end of each section. You can use these to quickly zip between different sections of this guide—just click where you want to go. Happy training!
Quick Click Table of Contents
- Setting Up for Success
- Day ONE: Let's Get Started!
- Day TWO: Keep It Up!
- Day THREE: Going Out!
- All About Accidents
- What About Poop?
- Naps and Night Time Training
- The "Course Correction"
- Odds & Ends

Defining Success - Laying the Foundations
Most "quick train" potty training programs do not do a great job of realistically defining what success looks like. Specifically, these programs do not explain that in three days your child WILL NOT be running to the toilet without assistance, wiping and washing his or her hands. FAR FROM IT!
Instead, what these programs mean is that after these three or so days your child should have a grasp on what we at One Proud Toddler call the “FOUNDATIONS” of potty training.
By “foundations,” we mean that after the first few days or so of training your child should be:
- Able to express he or she has to use the bathroom a few seconds before actually having to go (i.e. running up to you and saying "pee pee" or even just tugging on your leg while doing a “potty dance”).
- Successfully peeing and pooping in the potty chair through a combination of prompts and caregiver-directed potty sits following meals and fluids intake.
- Able to go out in public without a diaper (you will still be on “high alert”).
- Ready for handover to day-care (dependent on facility policies of course) and/or the babysitter for continued training.
Importantly, after these foundations are in place you will still need to be vigilant about reminding your child to use the bathroom (known as “prompting”) and helping with wiping. Accidents will still occur, albeit less and less frequently.
In fact, full and complete training—where your child requires no prompting, independently uses the toilet and is able to wipe—can take up to a month or longer.
TRAINING TOOLKIT
"Setting (Parental) Expectations"
At the outset it's important to set realistic expectations for the potty training process in order to minimize the stress that can come from incorrectly feeling that you are falling behind. Full and complete potty training takes a month or longer. Getting the foundations down, however, can be accomplished in as little as three days.
While we are on this topic, its important to note that while you (i.e. the parent), may be on a three (or four or five) day timeline for teaching your child the foundations of potty training, you SHOULD NOT convey this to your child because adding stress to the training process is a recipe for unnecessary problems. Furthermore, even if you are stressed out about this process, make sure to maintain a clam and level-headed approach towards your child. We've tried to help reduce parental stress by setting realistic expectations about what you can expect to achieve and by building a "Course Correction" safety valve into our guide should things begin to get off track. In short, know that you have the knowledge and backup plan necessary to keep your cool!
Making Sure You Are Ready - Key Training Principles
Now that we've defined success, its important that you know what it will take to get you there. Specifically, if you are going to do this in three days, then you need to be ready and intensely focused. This is a training exercise after all, and you are the “trainer.”
Trust us, it is much easier to do this in one dedicated block than in the drawn out manner found with the Parent-Led and Child-Led approaches to potty training (for a breakdown of the different potty training methods out there and the reasons behind our approach, read our blog "Making Sense of Different Potty Training Methods").
With that in mind, here are the keys to successful potty training:
KEY #1 - "CONSISTENCY"
This is the BIG ONE because consistency is the key to successful potty training. Once you start training, don’t give up. This means you continue training even if you are tired, have an unexpected outing and especially if your child is having accidents.
KEY #2 - "MISTAKES ARE PART OF THE PLAN"
Potty training is probably the first major learning exercise in your child's life, meaning mistakes will happen. In fact, they are part of the plan! Be calm, be supportive and stay with the program (i.e. maintain consistency).
KEY #3 - "BE PREPARED"
It's essential that you have blocked out your time, are in the right mental place, have the right equipment and have prepared your training environment by covering expensive rugs and furniture. As the “trainer,” you must be prepared so that you can give your child your undivided attention when the potty-training process starts
If you noticed that these three "keys to success" are cross-reinforcing, then you're correct! Maintaining consistency is how you train successfully—like any person, your child will not consistently perform a new and difficult task unless he or she is taught that consistency in performing that task is expected. Understanding that mistakes are part of the plan means you won't backtrack in frustration when those mistakes inevitably happen—allowing you to maintain consistency. Lastly, by being prepared you won't need to revert to diapers in order to run out for necessary equipment or give up after being put in a funk due to a destroyed rug, but instead will be able to stick with the plan and maintain consistency.
In short, if you internalize these three keys, you will have potty training success.
Making Sure You Are Ready - Equipment
To be prepared and maintain consistency, you'll need the right equipment BEFORE you start. This equipment will cost you between $50 and $100, depending on manufacturer, but this amount pales in comparison to what you'll save on diapers. What's more, your child will use much of this equipment until he or she is physically big enough to comfortably sit on an adult toilet and it will work for siblings as well.
Here's what you'll need:

Potty Chair
Place one of these small, approachable toilets on your bathroom floor and make sure your child knows it is their special potty. Some programs say to skip these and go directly for a potty seat, but we feel they significantly reduce the “toilet scare factor,” allow children to find and use the toilet unassisted with practice and are great prompting tools (more on this below). Read all about these great training tools in our blog "Why Potty Chairs ROCK!"

Potty Seat
Also known as seat reducers, these units go on top of the larger toilet seat. Your child won't be able to sit on your toilet comfortably until he or she is physically larger, so you'll be using this device for a while even after he or she is potty trained. Get one with a non-slip liner (trust us) for safety. You'll also need to pair it with a stool. For the inside scoop on what makes a great potty seat, check out our post "Features To Look For In A Potty Seat."

Travel Potty Seat
Keep one of these collapsible units with you in your purse or bag so that it is with you whenever you go out. These devices are not only LIFE SAVERS when facing a large commercial toilet, but are also essential to maintaining training consistency without the need to revert back to diapers when going out in public. Read all about why we love them in our post "Why Travel Potty Seats Are GRREAT!"

Everything Else
You’ll want to purchase a few pairs of loose fitting pants for your child, disinfecting wipes/gels, cleaning materials, plastic bags for accidents when you're training outside the home and training pants for naps and night time.
Making Sure Your Child Is Ready
As mentioned in our intro, there is a “zone” when most children are both physically and behaviorally ready to potty train, which is typically between 20-and-30 months old (for detailed information on the potty training “zone” read our blog “Why Early Potty Training is Better Potty Training”). By the time children are in the “zone” they will have already exhibited, or will start to exhibit, a number of key “signs” they are ready to train.
These signs include:
- “Knowing” when he or she is going poop or pee or has a dirty diaper.
- Staying dry in a diaper for one or two hours.
- Being able to understand and follow basic instructions.
Signs that your child “knows” they are going poop or pee include running to the corner or another private place to "go," doing a poop or pee “dance” and verbalization of the words (e.g. running up to you and saying “poo poo” or “pee pee” when he or she has a dirty diaper).
If you are unsure if your child is ready, one basic test is how you feel. In short, if you suspect your child is ready after reading this, he or she almost certainly is.
While we are on the topic of readiness, some helpful steps you can take prior to Day ONE include:
- Reading potty training books with your child, watching potty training videos and listening to potty training songs.
- Setting a “ditch the diapers date” and counting those days together with your child.
- Teaching your child to pull his or her pants up and down.
- Teaching your child the relevant "potty words" he or she will need for training and using them consistently (i.e. not switching between terms).
- Bringing your child into the bathroom when you are going to the toilet and verbalizing what you are doing.
- Changing your child's diapers in the bathroom at home and having him or her watch while you flush the contents of poop diapers down the toilet and verbalizing what you are doing.
- Making mental notes of your child’s potty behavior. When do they normally go—in the morning, after naps, after lunch? Where do they normally go—the corner, the pantry, behind the couch? What do they do when they go—do they have a potty dance, grunt and turn red, run somewhere to hide?
TRAINING TOOLKIT
"The Potty Schedule"
This concept refers those times of the day when your child normally poops and pees. Common times are right after waking up in the morning, following naps and 15-to-30 minutes after eating or drinking.
For detailed information on how to tell if your child is ready and our complete list of “potty prep steps,” read our blog “Signs Your Child is Ready for Potty Training.”
Quick Click Table of Contents
- Setting Up for Success
- Day ONE: Let's Get Started!
- Day TWO: Keep It Up!
- Day THREE: Going Out!
- All About Accidents
- What About Poop?
- Naps and Night Time Training
- The "Course Correction"
- Odds & Ends

Today you will stay with your child for the ENTIRE DAY and he or she will have your UNDIVIDED ATTENTION. You will play games with your child and just generally hang out—this potty training thing is going to be FUN! Oh, and he or she will be naked from the waist down.
First, Get Rid Of Those Diapers!
Begin the day with some ceremony by telling your child he or she is a “big girl/boy” and won’t be using diapers anymore because they will be using the potty chair going forward. If you set a “ditch the diapers” date with your child and have been counting down, then today is the day! Make a fun time of throwing out the diapers together with your child (place them in a trash bag if you want to use them for another child or to gift them to a friend). Now, it’s time to throw away that last diaper!
Initially, your child may be a bit “freaked out" when the diapers are removed. This is completely normal. Diapers have acted as a security blanket for your child since the day he or she was born. Without this familiar security blanket, however, your child will initially be unsure where to go poop or pee.
Take advantage of this moment of ambiguity! Do this by showing your child the toilet and explaining this is where he or she will go, “just like mommy, daddy and big kids do!” Introduce the potty chair and say this is a special toilet just for him or her. Have your child sit on the potty chair while you sit on the toilet just to show its not scary. Bring along your child’s favorite stuffed animal and have him or her “teach” it how to use the potty chair a few times. Remember this is going to be FUN!
TRAINING TOOLKIT
"Removing The Security Blanket"
Because diapers act like a security blanket, you don’t want to reintroduce them to your child during his or her waking hours, which can cause a regression in training and violates our key tenant of C-O-N-S-I-S-T-E-N-C-Y.
TRAINING TOOLKIT
"Potty Pals"
This is a powerful training tool you should use with your child to reinforce potty training concepts and the general social importance attached to being potty trained (the awareness of which is a powerful motivator):
The first is to show approval when your child successfully completes a potty training step. This is done by explaining to your child how proud grandma / daddy / superman / the neighbors—essentially anyone who is important to your child—is of his or her accomplishment.
The second is as a reinforcement mechanism by asking and answering questions like: “Where does daddy / superman / grandma go to the potty? That’s right, in the toilet.”
Now We're Training!
After you've done away with the diapers and introduced the potty chair, its time to increase your child’s fluid intake so that he or she will have to go. Wait about 15 minutes and watch EVERYTHING your child does.
TRAINING TOOLKIT
"Fluids"
Throughout these three days, you will be regularly giving your child fluids to create "potty practice opportunities." Don't overdo it though! For children over 24 months, 10-to-12 ounces more than he or she normally drinks in the morning and afternoon will be just fine. If your child is under 24 months, then an extra 4-to-6 ounces is fine.
Your child is naked from the waist down today for a reason: so that you can watch your child like a hawk ALL DAY to literally catch him or her in the act of going to then be RUSHED onto the toilet for teaching purposes.
To sum up Day ONE, you are literally watching your child for signs they have to go so that you can place them on the toilet, verbalize what is going on and then praise. It's that simple."
If you already know your child’s potty signs (e.g. a confused look on the face, running into the corner), then great! Just verbalize what you are doing and place him or her on the potty chair as soon as you see them (“you are jumping / holding your special area, that means you need to go pee pee / poo poo, lets go" ).
If you don't know your child's potty signs just yet, then start being on the look out for them and watch your child for any indication he or she needs to go. When you catch your child starting to go or giving off signs you think might indicate he or she has to go, simply take your child to the potty chair, say “it's time to pee pee” and have him or her sit.
Regardless of what you have (or haven't) observed your child doing, if he or she hasn’t gone to the potty chair in the past 30 minutes, then it's time to “prompt” your child by saying "let's go pee pee" and bringing him or her to the potty chair to sit.
TRAINING TOOLKIT
"Prompting"
Prompting is the technique by which you cue your child to go to the potty chair. During the first days of potty training, prompting is akin to a matter-of-fact instruction (e.g. “it's time to go pee pee"). It should be done in a firm, natural tone and immediately followed by you taking your child to his or her potty chair in order to try going to the bathroom.
In terms of timing, you should prompt: (1) at those times of the day when your child's "potty schedule" indicates he or she will likely need to go; (2) as soon as you see your child's potty dance; and (3) if it has been longer than 30 minutes since your last prompt.
TRAINING TOOLKIT
"Boys"
If you are potty training a boy, you'll want him to sit to pee during the first few weeks of potty training. Not only does this keep things simple and a lot less messy, sitting also promotes the relaxation necessary for bowel movements (you'll want to take advantage of the fact that "poop training" follows naturally from "pee training" as discussed in the section "What About Poop?").
While we are on the topic, you'll also want to teach him to push his penis down to avoid urine splashing out of the potty chair or through gaps between the toilet and potty seat.
Anytime your child actually goes pee in the toilet, verbalize what he or she is doing ("good job! you are going pee pee in the toilet like a big girl / boy"), then make a little ceremony out of emptying the contents of the potty chair into the big toilet and finally praise the accomplishment. Now repeat, all day long.
The goal for today is for your child (1) to begin to understand when he or she is physically going to the bathroom and (2) to start giving a few seconds of warning before he or she actually goes."
You accomplish this goal by giving your child fluids to create learning opportunities, catching your child in the act of going and then placing him or her on the potty chair, with the accompanying verbalization and praise.
TRAINING TOOLKIT
"Rewards: Just DON'T Do It"
During the potty training process, we recommend using praise as a positive reinforcement instead of rewards. This is because praise is a social reward that children universally respond well to and one that will help your child to develop a sense of intrinsic or self motivation. Conversely, the regular use of external rewards (like M&M’s) for a natural process like going to the bathroom can lead your child to expect a reward for everything they do.
That being said, if you’ve already started down the “M&M Path” in areas other than potty training, then potty training is not the time to right that ship. Just try to keep them tightly controlled.
Helpful Pointers for Day ONE
- Remember that Accidents Are Part of the Plan. In fact, there are really no accidents at all on Day ONE. At this point, if you catch your child too late to place him or her on the toilet, simply express your displeasure at the accident and say something like: "No you peed on the floor. Big boys / girls don’t pee on the floor, they go in the toilet.” Whatever you do, don't get mad and stay calm—your response to your child's first "accident" (even if it doesn't really count as one) will set the scene for the rest of the training process.
- When your child sits on the potty chair, try to have them stay there for as long as possible (ideally three-to-five minutes). The goal is to promote the relaxation that is necessary for your child to pee and poop. Get creative to try to have your child sit for longer, by playing games or signing songs while he or she is on the potty chair.
- When rushing your child to the potty chair, DON'T make this scary. Explain what you are doing and why you are getting him or her there so quickly (e.g. "mommy is rushing you to the bathroom so you can go pee pee in the potty.")
- Your child may not poop at all on Day ONE. This is normal, especially given the fact that we have completely upended the way your child goes to the bathroom. (For detailed information pooping, read the section titled "What About Poop?" towards the end of this blog).
- Other than being on the look out for your child's "potty signs," you'll also want to identify their "potty schedule" if you haven't already. A large part of successful potty training is prompting your child to use the bathroom in accordance with their potty schedule.
- It goes without saying, but you'll need to make sure your child is in a safe location for the naked portion of potty training. It's also important to keep pets away from his or her private parts.
- Verbalize everything you and your child are doing, and break tasks down into their component steps to assist your child with understanding.
- Invoke your child's "Potty Pals" throughout the training process as a source of social motivation for your child (e.g. "you peed in the potty chair, grandma would be so proud") and to reinforce the training concepts you are trying to teach (e.g. "does grandma wear diapers? no, she pees in the potty like a big girl.")
- At the end of the Day ONE (and every other day), even if you feel things aren't going that well, let you child know how much they accomplished and how proud you are (they probably accomplished a lot if your really think about it). Tell them what new potty training skills they will learn during the day ahead and that they will move on to these new skills because of how well they are progressing. The goal is to build on your child's success each day.
Closing Out Day ONE
You should have some successes by the end of Day ONE before moving on to Day TWO. By this we do not mean anything close to perfection. Instead, we just mean that towards the end of the Day ONE your child has successfully peed (and possibly pooped) in the potty chair with the help of your prompts. It also means you are starting to see a few seconds of warning between when he or she starts the "potty dance" or verbalizes "pee pee / poo poo" and when he or she actually goes. Success does not mean your child is verbalizing and running to the bathroom himself or herself (although some may see this). Success also does not mean no accidents. It just means you feel your child is "kinda getting this going pee on the potty chair thing."
If at the end of Day ONE you find that your child just isn’t “getting it”—by this we mean your child is completely confused by what he or she is supposed to do or appears oblivious to his or her bodily signals (e.g. going pee without even knowing it)—then don’t’ worry. It’s just time for the "Course Correction" covered at the back of this blog. If halfway through Day ONE you're absolutely convinced this isn't working, then you can try the Course Correction in the afternoon. Otherwise, you can try in the morning of Day TWO. The good news is that the "Course Correction" typically only take around four hours, so by the afternoon of Day TWO you should be right back on track!
Quick Click Table of Contents
- Setting Up for Success
- Day ONE: Let's Get Started!
- Day TWO: Keep It Up!
- Day THREE: Going Out!
- All About Accidents
- What About Poop?
- Naps and Night Time Training
- The "Course Correction"
- Odds & Ends

Keep Up the Good Work!
Now that your child has had some successes during Day ONE, its time to build on those!
At the outset, it's important to know that you may start to experience some push back from your child on Day TWO. This is natural and actually a sign your child is mature enough to know what he or she wants (and hence a reaffirmation he or she is ready for potty training). Don’t give up, you and your child WILL get through it. Remember C-O-N-S-I-S-T-E-N-C-Y is the ticket to success!
Day TWO - In The Morning
Now that the bad news about potential pushback is over, here is the good news: today you will essentially continue doing what you did on Day ONE. That means you will again start the day by giving you child fluids.
- REMEMBER: Fluids = Potty Practice Opportunities
Your child will also remain “sans pants” and you will continue watching like a HAWK for his or her telltale “potty signs” (you should have some idea of these as well as your child’s “potty schedule” by now). Just like Day ONE, when you observe these you will give a prompt (e.g. "let's go pee pee") and then quickly place your child on the potty chair (accompanied by praise and emptying the potty). As the day progresses, you should be having more successes and getting a few more precious seconds between the time your child exhibits his or her “potty signs” and when he or she actually “goes.”
THINGS TO KEEP DOING
- Giving fluids
- Verbalizing what steps are being taken
- Invoking “Potty Pals”
- Prompting
A quick note that when you provide prompts around those times when you know your child typically goes (i.e. prompting in line with his or her "potty schedule"), you may experience some push back as mentioned above. THIS IS NORMAL. It likely means your child doesn’t have to go (say “I understand and will be waiting”) or doesn't want to miss out on activity (tell him or her its okay to bring the toy to the bathroom or can continue the activity when they return). If either of these approaches don't work and the push back continues, read the troubleshooting pointers in the Odds & Ends section found at the end of this guide.
As was the case with Day ONE, if your child hasn’t gone to the bathroom in the last 30 minutes or so, its time for another “prompt.”
Day TWO - In the Afternoon
If things are progressing well (i.e. your child is generally "getting it," even if he or she isn’t always quite making it to the potty chair in time), then its time to get your child into loose fitting pants. Before you do this, however, first explain to your child that because they have been doing so well with using the potty chair while naked, they've now progressed to the stage where they get to practice wearing pants. The goal being to convey that you are building on your child's successes as the training process progresses.
The keys to whatever pants you choose is that they are easy to take on-and-off and that they in no way feel like a diaper, so underwear are out. When the pants are introduced, it's important that you teach your child how to take them on and off. The best way to do this is through the “manual instruction” technique.
TRAINING TOOLKIT
"Manual Instruction"
This is a powerful yet simple learning technique for your toddler that some may refer to as "manual prompting" or "manual guidance." Essentially, you first clearly explain to your child how to perform a task. Next, you let your child attempt it on their own, understanding that even simple tasks take toddlers much longer to perform. After patiently watching your child attempt the task, you place your hands over theirs and "manually guide" them to complete the task. This technique is great for teaching children a variety of potty training skills, including how to dress-and-undress themselves and flush the contents of the potty chair.
Once the loose fitting pants are on, continue looking for your child’s potty signs, paying attention to his or her potty schedule and prompting, just like you did in the morning.
Importantly, although your child will likely initially want to use the smaller potty chair, after some successes its time to try the “big potty” using the travel potty seat. This is because you will need to have practice using this unit for when you train in public restrooms on Day THREE.
TRAINING TOOLKIT
"Travel Potty Seat"
It’s very important to introduce the travel potty seat on this day and for your child to become comfortable sitting on it. This tool will be the key to maintaining consistency when you go out towards the end of Day TWO (possibly) or on Day THREE (definitely).
If things seem like they are progressing really well towards the afternoon on Day TWO and your child is comfortable on the travel potty seat, feel free to try one or two small errands. Read ahead to Day THREE for detailed instruction on Going Out!
Quick Click Table of Contents
- Setting Up for Success
- Day ONE: Let's Get Started!
- Day TWO: Keep It Up!
- Day THREE: Going Out!
- All About Accidents
- What About Poop?
- Naps and Night Time Training
- The "Course Correction"
- Odds & Ends

This day is all about practicing using the potty in locations that are NOT your home. Potty training outside the home is arguably the most common point where things get tripped up—get it right, however, and you’ve set yourself up for success and, if applicable, your upcoming handoff to daycare (you can read all about this last bit in our post "The Daycare Handoff").
So why do so many parents stumble after experiencing initial success at home? It all goes back to our key point of C-O-N-S-I-S-T-E-N-C-Y. Specifically, many parents are terrified about the possibility of having an accident in public and for that reason place the child back into diapers. Resist the urge!
We had you introduce your child to the travel potty seat at the end of Day TWO to avoid the need to re-introduce diapers. Specifically, this will provide a familiar and comfortable platform that you can easily place your child on during prompts and potty sits without the need to crouch and hold him or her on the toilet with your arms. It is a lifesaver!
With that all out of the way, your goal today is to have your child successfully use the toilet in a variety of locations outside the home. Make things fun and try to go to familiar places you know aren’t too busy, dirty or "fancy."
DAY THREE THINGS TO BRING CHECKLIST
- Travel seat
- Several changes of clothing for your child
- Plastic bags for accidents
- Disinfectant
- Wipes or paper towels for clean-ups
- Changing pad or towel to line your child's car seat
- Wide mouth plastic cup
TRAINING TOOLKIT
"Widemouth Plastic Cup"
Among all of the items in our Things to Bring Checklist, you may be wondering about why we included widemouth plastic cup. Well, it's a great tool for boys AND girls when they have to go to the bathroom in a pinch in places where there is no bathroom (we mean "pee" of course).
So Let's Get The Day Started!
Today you will again start the day by giving your child fluids. However, don't go quite as heavy on the fluids as you did on Days ONE and TWO, because ideally you'd like to avoid an accident while traveling in the car. Essentially, we're talking about an extra cup of water or so (if you want to be extra safe or have a long drive, hold off on the fluids until after you arrive at your destination).
You will also want to place your child in a pair of loose fitting pants that are easy to take on-and-off, just like you did at the end of Day TWO.
Also like Days ONE and TWO, throughout the entire day you will continue looking for your child’s potty signs, paying attention to his or her potty schedule and prompting at least every 30 minutes.
Shortly before you go out in the morning, MAKE SURE your child goes to the bathroom at home using the travel potty seat to reduce the likelihood of an accident in the car. Explain that he or she will be going out with you and that he or she will be using the toilet in the store with the travel potty seat, "just like a big girl /boy." Further explain that you taking this big step because of all of their progress with potty training.
TRAINING TOOLKIT
"What to Do When Driving"
Although we had you line your child's car seat with a changing pad or towel before going out, if your child expresses the need to go to the bathroom while in the car, PULL OVER IMMEDIATELY and help him or her go. If you're lucky and it's just pee (thankfully usually the case), use the widemouth plastic cup discussed in the training toolkit above. If you think there is the possibility of the need for a "poop pit stop," we'd suggest bringing the potty chair in the trunk.
Now its time to go out! Get all of your equipment for the day ready and make sure to line your child's car seat with a towel or changing pad. Also, make sure to identify locations with clean restrooms (ideally with a standalone family restroom) and that aren't too "fancy" (e.g. avoid the oriental rug store).
Good Travel Locations FOR DAY THREE
- The Public Library
- The Mall
- Big Box Stores
- Museum
How to Handle Things When You Are Out and About
Once you’ve “launched the rocket ship” and are out and about, the ABSOLUTE FIRST thing to do when you get to each location is to take your child to the bathroom and explain that this is where he or she will go potty. Next, take the travel seat out, place it on the toilet and ask if he or she wants to go. If no, fine, proceed to look and shop in the store and have fun.
Many parents are terrified of taking children in the midst of potty training out in public for fear of accidents. GET OVER THIS FEAR! Yes, accidents in public do happen. Yes, they are embarrassing. But every child needs to be potty trained and it's A LOT more embarrassing to deal with a four year old having accidents at school!"
When the time comes around, prompt and take your child to the toilet. If he or she doesn’t go, then continue on having fun. If at any point your child is doing his or her special dance, then PROMPT, DROP EVERYTHING and RUN TO THE POTTY! You need to respect your child's "call" and the fact that they cannot “hold it” for more than a few seconds at this point. To get some extra time, make a game of counting to ten together while you find the toilet, which may buy you up thirty seconds, MAX.
When you ask your child if he or she needs to go in public, they may say “no” even if they are in the midst of their potty dance. This is because they are intimidated by the new environment. You still need to RUN to the toilet!
As we've done throughout this program, whenever your child actually uses the toilet, continue to verbalize everything that is being done (“you are pottying in the Target bathroom like a big boy / girl”) and praise successes. Repeat this process throughout the day.
The End of Day THREE - Tying Things Together
By the end of Day THREE, your child should largely have the "foundations" of potty training in place. CONGRATULATIONS!
Going forward, you will still need to pay attention to your child's potty schedule, look for his or her potty signs and prompt. This process, however, will get much easier. Specifically, over time your prompts will start to space out more and more. You will also continue to get a better idea of your child's potty schedule and his or her bathroom breaks will naturally revolve more and more around that schedule.
TRAINING TOOLKIT
"Prompting Changes Over Time"
After you've completed Day THREE, your prompting style will start transitioning from “telling” to “reminding” your child that it's time to go. To provide an example, one good way to provide a "reminder" prompt when you are at home is to say "I can see you are doing your pee pee dance—would you like to pee in the big potty or your potty chair?" This puts the idea in your child's head, but makes the decision their's.
As your child begins to get a better handle on what is expected of him or her, you can move from "reminder" to "blase" prompts, where you simply inform your child the of the existence of the potty chair and move on to a different activity, which really puts the ball in your child's court. The goal is for your child to gradually take over complete ownership of the process of peeing and pooping on the potty chair / toilet.
It's also important to make sure not to over prompt, which can cause frustration on your child's part, and to keep prompting natural. Every 30 minutes is about right if done naturally and not in a nagging manner, as well as at those times of the day that correspond with your child's "potty schedule" (e.g. after waking up, after meals, etc.). You'll know you are over doing it if your child "got it" during Day ONE and TWO, but is starting to push back as if annoyed by your prompts on Day THREE and afterwards.
Your child will also become more and more aware of his or her bodily signs and will begin to go without being prompted. In the potty training profession, this is known as "Self Initiation."
TRAINING TOOLKIT
"Self Initiation"
This occurs when your child realizes that he or she needs to go to the bathroom and lets you know without prompting (we call these "baby self initiations"). It also includes when your child recognizes he or she needs to use the restroom and then actually goes on the potty chair or toilet without assistance (we call these "big boy/girl self initiations"). You will likely start to observe your first "baby self-initiations" around Day TWO or Day THREE—it can take a week or two for your child to start having "big boy/girl self initiations." Regardless of the type, when you experience a self initiation praise your child like crazy, verbalize why you are so proud and recognize their accomplishment.
After you begin to observe self initiations and you feel your child is getting this new potty training thing more and more, you can introduce underwear (Yay!). After that, you only have wiping to go and your child will be fully daytime potty trained.
TRAINING TOOLKIT
"Reintroducing Underwear"
We'd recommend waiting between two-and-four weeks after commencing training before reintroducing underwear. This is because you want your child to completely forget the security blanket of the diaper or else you'll risk a regression in training. Your ability to wait this long will of course depend on whether your child is in daycare and whether they have a policy on this. Read our post, "The Daycare Handoff" for everything you'll need to know about how to handle this crucial transition.
Along the road accidents WILL continue to occur, albeit less and less frequently, for various reasons (accidents are discussed in depth below). Just remember to maintain C-O-N-S-I-S-T-E-N-C-Y and you will come out successful!
Quick Click Table of Contents
- Setting Up for Success
- Day ONE: Let's Get Started!
- Day TWO: Keep It Up!
- Day THREE: Going Out!
- All About Accidents
- What About Poop?
- Naps and Night Time Training
- The "Course Correction"
- Odds & Ends

Remember That Accidents ARE Part of The Plan
Potty training is a completely new task for your child unlike anything he or she has tackled before. What this means, is that accidents WILL happen. What matters is how you react to them and that you view them as the teaching opportunities they are.
TRAINING TOOLKIT
"The First Accident"
Your reaction to your child’s first accident will set the tone for the remainder of the potty training process. Don't get mad! Stay calm and follow the three step process outlined below.
What’s more, by now you know that much of the first two days of potty training is actually about catching accidents as they are happening and turning them into learning exercises. In short, accidents are actually part of the plan.
It's important to note that there are really no 'accidents' for our purposes until your child has moved into loose fitting pants, which will occur around half-way into Day TWO if you are on our standard schedule or possibly as early as the afternoon of Day ONE if you decided it was necessary to make a 'Course Correction.'"
So How To Handle Accidents?
It's as easy as 1, 2, 3:
#1VERBALIZE. Show verbal disapprovement BUT do not get angry (i.e. you aren’t mad at them, it’s just that you dislike dirty/wet pants). Say something like: “No, you are wetting your pants / peeing on the floor. Big boys don’t wet their pants / pee on the floor, they go in the toilet.”
TRAINING TOOLKIT
"The (Slightly) Startling 'NO'"
If you catch your child mid-pee or poop, it is okay to use a loud-ish (but not angry) “NO!”. This is to get him or her to stop right then and there so they can be placed on the toilet as part of a teaching exercise. After this (slightly) startling "NO," all other statements should be made in an even tone of voice.
#2CLEAN UP. If your child hasn’t noticed already, make him or her aware of their wet pants. Do this by having your child check their pants and by explaining big boys and girls do not wet their pants. In the case of a “pee” accident, have your child change his or her pants and help clean up the location where the accident occurred. For "poop" accidents obviously don’t let your child come into contact with the feces, but do have him or her assist as much as possible (e.g. by putting on new clothes).
#3DIG DEEPER. All accidents have a reason! It may be your child was unable to find the potty chair soon enough, which can be fixed with "practice runs." It could be your child doesn't want to miss out on a fun activity, which can be solved by telling him or her the activity will be waiting when they return. Below is a list of common reasons you child may be having accidents and some suggested solutions:
| REASON | SOLUTION |
|---|---|
| Afraid of Using Potty Chair | Practice going on the potty chair (or toilet) with a favorite doll or stuffed animal. This will show your child that the stuffed animal went poop and pee on the potty chair and “survived.” If you suspect this fear caused your child to have a "poop" accident, try the "scoop and flush" technique by going with your child to pickup and place the poop in the potty chair, explaining that is where the poop belongs. Afterwards, empty the pot into the big toilet and flush it down together, saying “see, it's not scary at all.” |
| Doesn't Want to Miss Out on a Fun Activity | Explain to your child that he or she can bring the activity / toy with them to the restroom or that the activity / toy will be waiting for them when they return. This is also a common reason that children resist prompts on Days TWO and THREE and can be addressed the same way. |
| Not Quite “Making It" There In Time | Practice getting to and sitting on the potty chair quickly from the location where the accident occurred and from other locations around the house (this is also a good technique for responding to your child's first accidents even if you aren't aware of the cause). If this is only happening with "poop" accidents, then try the "Poop Putty Trick" described in the Training Toolkit box below. |
| Goes As Soon As You Turn Around | This means your child is able to hold it, yay! Next time, after you prompt and place your child on the toilet, try "remembering" something just outside the room (if safe) or try doing something on the other side of the bathroom like washing your hands so that you can turn your back to your child. There is a good chance he or she will "go" when your back is turned. |
| Goes Right After Getting Off Potty Chair | This means your child likely is not sitting for long enough. Try performing an activity with your child—such as reading a book, singing or playing games like "rock, paper scissors" or "I spy"—while he or she is sitting on the potty chair. Anything to keep him or her on the potty chair a few minutes longer will help. |
The list above represents some of the more common reasons for accidents, but by no means all of them. If you encounter an accident that doesn't fall into one of these categories, approach it by digging deeper to understand the reason behind the accident and then think of a creative approach for resolving it, such as the "poop putty trick."
TRAINING TOOLKIT
"The Poop Putty Trick"
This is a great technique to try with kids who are having "poop" accidents and appear to be trying to make it to the bathroom, but aren't quite getting there in time. It involves using putty, clay, Play-Doh or even pizza dough to visually show your child what happens when he or she has a bowel movement. Do this by showing how the poop is stored inside the body (using your fist) and goes out through the sphincter (by squeezing it out through the “sphincter” created by your thumb and index finger at the top of your fist). This illustrative technique will often help make things “click" and help your child better understand his or her bodily signals.
In short, when you encounter accidents look for the root cause, get creative if necessary and don't get discouraged. As if we haven't said it enough, remember that ACCIDENTS ARE PART OF THE PLAN.
What If They Continue?
If your child is continuing to have accidents late into Day TWO (or beyond) and you can't quite figure out why (i.e. it's not like your child is trying to get there and just not making it; instead, it feels like he or she isn't trying), this may be because your child is testing you or doesn't truly understand that he or she is expected to poop and pee in the potty chair. To figure this out, we recommend using a “small direct consequence” following an accident.
TRAINING TOOLKIT
"Small Direct Consequences"
This technique involves taking away a toy or discontinuing an activity right then as an immediate consequence for an accident. When employing this technique, do not be mean or become angry and make sure your child understands the consequence is directly related to the accident (i.e. you are giving a consequence as opposed to a punishment).
If you child truly has the "foundations" down (i.e. understands he or she is expected to poop and pee in the potty chair and knows how to do it), a small direct consequence will generally clear things right up. On the other hand, if your child seems like he or she really wants to use the toilet to avoid the small direct consequence but can't, then it is more likely you have experienced a true "accident" and you should handle the next one by verbalizing, cleaning-up and digging deeper.
Quick Click Table of Contents
- Setting Up for Success
- Day ONE: Let's Get Started!
- Day TWO: Keep It Up!
- Day THREE: Going Out!
- All About Accidents
- What About Poop?
- Naps and Night Time Training
- The "Course Correction"
- Odds & Ends

It's Not Rocket Science
Pooping is the subject of a lot of divergent thinking in the world of potty training. Some of the most popular potty training books on the market make a very big deal about it, devoting pages upon pages to the topic. Other’s devote only a mere paragraph. Here is what we know:
1Pooping tends to occur with urination. It should follow naturally once your child is peeing in the toilet.
2Bowel control usually occurs before urination control, so it is arguably easier to learn.
3If you child isn't pooping during Day ONE or Day TWO don’t be alarmed because potty training is new and kids can hold it for a while.
4Handle "poop accidents" just like you would "pee accidents" but make sure your child doesn't come into contact with feces during the clean-up.
5Pooping during training can initially be scary. Sit with your child, read /sing with them, even give a hug to let them know it's going to be OK.
6Kids are nuts about emptying the potty chair into the toilet after a poop. Make a big deal out of the "empty and flush" to keep things fun.
Common "Poop Problems and Solutions"
With all that said, poop training should follow naturally from your child's pee training. Problems tend to arise because: (1) pooping over an opening (potty chair or toilet) can be scary; (2) children (especially older children) require more privacy for pooping; and (3) children aren't quite sure of the signals their bodies are sending.
For the first common problem, a great way to get rid of the "pooping fear factor" is to "practice" going on the potty chair or toilet with a favorite doll or stuffed animal. This will show your child that the stuffed animal went poop on the potty chair or toilet and “survived.” If the problem continues, then try the "Scoop and Flush" technique.
TRAINING TOOLKIT
"The Scoop and Flush"
If you think your child may be having "poop" accidents because he or she is afraid of the potty chair, you can also try the "scoop and flush" technique. That is, after your child has an accident on the floor go with your child to place the poop in the potty chair and explain that is where the poop belongs. Afterwards, empty the pot into the big toilet and flush it down together, saying “see, it's not scary at all.”
For the second common problem, you’ll know your child needs more privacy if he or she is doing their special “dance” and then goes as soon as you turn your back. To fix this, the next time place him or her on the toilet “remember” something on the other side of the bathroom so you can turn your back for a few moments. A poop will likely be exactly where you want it when you turn back around (i.e .in the potty chair).
For the third common problem, if you think your child is trying to get there but isn't quite understanding the signals his or her body is sending, try the "Poop Putty Trick."
In Summary
Relax! Pooping usually follows naturally from pee training and if your child isn't pooping just yet, her or she almost certainly will once the shock of this "new potty training thing" wears off.
TRAINING TOOLKIT
"Don't Sweat The Reluctant Pooper"
Don't be concerned if your child doesn't poop at all during Day ONE or Day TWO. Potty training is new and scary after all! In fact, not pooping is a sign your child can hold it. Try keeping your child calm on the potty chair (to promote relaxation) and giving him or her a bit more privacy by "remembering" something on the other side of the bathroom. If your child goes a few days without pooping or has general constipation issues, however, call your pediatrician.
In short, if your child is getting the “peeing thing” down, then success with the pooping part will come. Keep up the good work!
Quick Click Table of Contents
- Setting Up for Success
- Day ONE: Let's Get Started!
- Day TWO: Keep It Up!
- Day THREE: Going Out!
- All About Accidents
- What About Poop?
- Naps and Night Time Training
- The "Course Correction"
- Odds & Ends

Night and Day Are Very Different Animals
Naps and particularly night time potty training are very different animals when compared with day time potty training. This is because many children are not physically able to hold their urine through the night until they are four, five or even six years of age. In fact, physicians do not usually consider bedwetting to be an issue until age six.
That being said, many children are night time trained before three and many parents find night time training occurs naturally with potty training. You'll have a good sense if your child is ready to try night time training if he or she is waking up dry following naps, which is a strong signal they are ready.
TRAINING TOOLKIT
"Testing The Nap and Night Time Waters"
To see if your child if your child can stay dry for a nap and is ready for night time training, its advisable to restrict their fluids AT LEAST one hour prior to nap time.
So What Do We Recommend?
When you start potty training, we generally recommend using pull-up diapers or training pants for naps and at night if your child is under three-and-a-half. This is because there is a whole lot going on with the day time training and tackling the two separately can make them seem more manageable.
If you do decide to go this route, prior to putting the pull-ups or training pants on your child before bed, explain that these are not diapers, but instead “special sleepy time pants” that go on only during naps and at nighttime because he or she is still learning how to use the potty. Also explain that they will come off as soon as he or she wakes up.
How About Actual Night Time Training
After you find that your child is staying dry for naps or if he or she is approaching three-and-a-half, it’s time for actual night time training without his or her “special sleepy time pants.”
To do this, you will need to do start severely restricting your child’s fluid intake at least two hours before bedtime.
You will also need to set an alarm (ideally one that isn’t too loud) to remind you to wake your child during the night in order to use the bathroom. By now you probably have a pretty good idea of how long your child can hold his or her urine, so if your child can really hold it, then one "waking up" in the middle of the night is fine to start (a good time is right before you go to bed).
Over time your child will be able to “hold it” for longer and longer. You’ll start to notice this when your child groggily indicates he or she doesn’t need to go during the wakings.
Once no wakings are needed, your child is officially night time trained!
Helpful Tips
- The completion of night time potty training may occur much later than day time training as many children do not develop the ability to hold urine overnight until they are older. For this reason, and also because of the fact that your child is literally asleep, there are "no night time accidents." In short, don't get upset with your child for having an accident while asleep!
- If the bathroom and potty chair aren't close by, consider using a wide mouth plastic cup or other receptacle for him or her to pee in. Again, the goal is to avoid making your child completely awake.
- For wakings, don't turn on bright lights and use a low volume or vibrating alarm that only wakes you so that you can gently awaken your child to use the toilet (this way your child will not become completely awake and more difficult to put back to sleep).
- As recommended by one of the moms in our Real Life Potty Training Series, double make your child's bed as follows so that you can quickly get them back to sleep in the event of an accident: fitted sheet, waterproof liner, another fitted sheet and another waterproof liner. If the top layer gets wet, just strip it off!
Quick Click Table of Contents
- Setting Up for Success
- Day ONE: Let's Get Started!
- Day TWO: Keep It Up!
- Day THREE: Going Out!
- All About Accidents
- What About Poop?
- Naps and Night Time Training
- The "Course Correction"
- Odds & Ends

Getting Back On Track
If at the end of Day ONE you find that your child just isn’t “getting it”—by this we mean your child is completely confused by what he or she is supposed to do or appears oblivious to his or her bodily signals (e.g. going pee without even knowing it)—then it may be time to employ our "Course Correction" during either the afternoon of Day ONE or morning of Day TWO.
The concepts found in this "course correction" are based on training techniques that were initially developed for adults with severe cognitive disabilities and then modified for children in the early 1970's. They are one of the few training methods we've found that purport to have some sort of scientific backing regarding effectiveness. We've modified these concepts to bring them into the 21st century by doing away with negative feedback and external rewards, among other changes, and have included them in the Potty Proud Approach because we find they are an effective way to potty train children fast. We understand it's a long read, but if you follow these steps closely you should breeze through them in around half a day or so. That being said, if you have the luxury of more time, then it's fine to stay with the "standard" Day ONE program for an extra day or two before trying these techniques.
For the "Course Correction," you will need the following equipment:
- A doll-or-teddy-bear-like toy
- Two or three pairs of pants or cloth "underwear" to place on the doll (newborn baby clothes or even a cloth towel will work)
- A squirt water bottle
- At least five pairs of VERY loose fitting pants for your child.
If you have the time and want to get "fancy," then you can purchase a "drink-and-wet doll" that will cover the first three items above. In our opinion, however, training is more effective and natural when its done with a doll or teddy bear your child already enjoys.
With respect to the pants for your child, you want them to be loose so that they are very easy to pull up-and-down. You also want your child to be conscious that he or she is not in a diaper.
You may be wondering why loose fitting pants are necessary for the "Course Correction" when going "sans pants" is such an integral part of the "standard plan"? This is because many children requiring a course correction are struggling to understand their bodily signals and the pants provide an instant awareness of wetness. They are also sufficiently different from diapers to remove the security blanket feeling we are trying to get away from.
Let's Get Started
This entire process typically takes around 4 hours, but can take up to an entire day, so you'll want to embrace this variability upfront. You'll also want to prepare an area of the home that is completely devoid of distractions—ideally a bathroom to place the potty chair in and an adjoining room. To further keep distractions down, it will be just you and your child. No siblings, friends or other parents. Also no toys, TV, games, cell phones (texting, answering or checking them), etc.
If you thought the beginning of Day ONE was overkill in terms of focus, then we are really talking FOCUS now. This means 100% of your undivided attention on your child. This also means keeping your child’s focus 100% on the training exercises—if your child becomes distracted or goes off topic, you'll need to continually redirect his or her attention to the task at hand. Sorry, but this intense focus is what it takes to get back on track.
Now, place your child in his or her first set of VERY loose fitting pants and take these steps:
#1For STEP #1, you will have your child teach the doll how to use the potty chair and also offer your child the chance to emulate what he or she just taught the doll. The goal is to have your child learn all of the actions involved in using the potty chair.
Start by having your child give the doll a pretend “drink of water." Next, tell your child the doll has to go “pee pee” because of the water it just "drank." Instruct your child to help the doll to the potty, pull down the doll's pants and have the doll "sit" on the potty chair. Make sure to allow your child to first attempt each action and be patient as he or she tries to follow your instructions—if their progress halts or they become distracted, use the manual instruction technique to guide them through.
Once the doll is on the potty chair, tell your child to look between the doll's legs and then discreetly use the squirt bottle to create a stream of "pee." Have your child see the “pee,” hear the "pee" and, if possible, touch the "pee stream" with his or her hand—the goal is to try to involve as many senses as possible.
While the doll is "peeing" have your child verbally praise the doll, perhaps even clapping his or her hands or giving it a hug (you can say something like: "teddy is a big boy, he goes pee pee on the potty chair, good job teddy!"). Next, instruct your child to "help" the doll pull up its pants, empty the pot into the “big potty," flush and return the pot to the potty chair. Afterwards, praise the doll again with your child to recognize the doll’s “accomplishment.”
Now, that the doll has used the potty chair, ask your child if he or she would like to use the potty chair himself or herself "like teddy just did." If no, that is fine and move on to the “dry pants check” exercises in the Step #2 below. If yes, have your child sit on the potty (“just like teddy”) and try to urinate. Explain what your child is doing (“you are trying to go pee pee on the potty chair, just like a big girl / boy”). Praise like above and, if your child actually urinates, have him or her enact the steps they just taught the doll (e.g. pull up his or her pants, empty and flush the pot contents, etc.) while you continue to offer praise.
TRAINING TOOLKIT
"Manual Instruction"
We introduced this powerful training technique earlier and are highlighting it again here given its effectiveness with teaching children who are struggling to learn potty training tasks. This technique requires finesse and should initially be given with a light touch, so that you can apply more or less guidance as necessary (or even back off entirely) while your child performs the relevant potty training task. It's also a great way to get your child to start a potty training task you have instructed them to undertake, but which they are not starting for some reason (either because of a lack of understanding, hesitation or push back).
TRAINING TOOLKIT
"Verbalization and Praise"
For each step in the Course Correction, it is important to verbalize exactly what your child is doing and relate your praise to a specific action in the potty training process (e.g. “so happy you are pulling down your pants / sitting on the potty chair / going pee pee in the potty chair / etc.”). You'll also want to verbalize and praise as soon as the action begins as well as while the action is being completed by your child (including those times when you are providing "manual instruction").
Over time, you will only praise for successfully undertaking or completing bigger actions (e.g. “you are peeing on the potty chair all by yourself like a big boy / girl); and finally only for “self initiations” (e.g. you just used the potty all by yourself like a big boy / girl).
The movement through these “praise progressions” will be quite quick with the Course Correction—by the end of the day you will have moved to praising only for self-initiations.
#2For STEP #2, you will teach your child to perform “dry pants checks” on the doll and have your child teach the doll how to "practice" using the potty chair following an accident. The goal is to teach your child both the difference between wet and dry pants AND what to expect following an accident.
To teach your child to perform "dry pants checks" on the doll, begin by taking your child and the doll to a location just outside the bathroom where the potty chair is located. Next, tell your child to check and feel the doll’s pants to see if they are dry (they will be). When your child informs you that the doll's pants are in fact dry, tell your child the doll is being a “big boy / big girl because he / she has dry pants.”
Next, ask your child to check if he or she has dry pants. Instruct your child to feel his or her pants—while your child is doing so ask "are your pants dry?" (they likely will be so offer praise). If your child is unsure how to check his or her own pants, use the manual instruction technique to show them. Repeat the sequence of having your child check the doll and then himself or herself two more times, each spaced out by five minutes.
Now, place some water on the crotch area of the doll when your child isn’t looking and instruct your child to check the doll’s pants again. When your child "discovers" the doll has wet its pants, have your child tell the doll he or she is not pleased (e.g. “no teddy, big boys / girls don’t wet their pants; we really like teddy but we don't like wet pants.”).
It's now time to have your child teach the doll how to "practice" using the potty chair following an accident. Start by telling your child to help the doll practice using the potty chair because the doll wet its pants and needs to learn to where to pee. Do this by instructing your child to take the doll to the bathroom, pull down the doll’s pants and sit on the potty chair. Don't make the doll go "pee" with your squirt bottle—if your child asks why the doll isn't going pee when sitting on the potty, explain that the doll doesn't have to go again just yet because of the accident and that you are practicing to make sure the doll knows how to use the potty chair. Afterwards, have your child take the doll back to where the accident occurred and repeat these "practice" steps two or three more times. Each time you repeat, have your child feel the doll after you’ve asked him or her to check the doll’s pants and say “no teddy, big girls / boys don’t wet their pants; teddy needs to practice going to the potty chair.” At the end, have your child change the dolls pants. Then, finish up by asking your child what happens when "teddy wets his pants?" You are looking for a response that's something like "he must practice going to the potty chair."
To come full circle, when you've completed the accident "practice" detailed above ask your child to feel his or her own pants, with you showing how this is done if necessary. The pants should be dry, so praise your child by saying he or she is a “big boy / girl with dry pants.”
#3For STEP #3, you are going to repeat Steps #1 and #2 until your child masters them (usually between two and four times), while also having your child perform "dry pants checks" on himself or herself every five minutes. The goal is for your child to master what was learned during Steps #1 and #2 and to reinforce the importance of staying dry.
Start by giving yourself and your child a break of five or ten minutes following the completion of Step #2. This allows the concepts that you just taught him or her to sink in and breaks up some of the intensity of training. This break also provides a great opportunity to use a question and answer version of the the "Potty Pals" technique in order to reinforce the concepts that you just taught your child (e.g. "does grandma pee in her pants? No she goes pee in the potty like a big girl.").
Once that time has passed, have your child again give the doll a "drink" of water, say the doll has to go "pee pee" and repeat Step #1 above (i.e. have your child take the doll to the bathroom, lower its pants and sit on the potty chair while make the doll "pee pee" using your squirt bottle, followed by praise, emptying the toilet and asking your child if her or she wants to try peeing on the potty chair).
Next, repeat Step #2 above (i.e. the “dry pants checks” and accident "practice") and then take another five or ten minute break.
Now, repeat Step #1 and Step #2, take a break, and do it all over again. You'll need to continue doing this (i.e. repeating Steps #1 and #2) until your child is “getting it.” Make sure to be positive and supportive the entire time!
To provide some perspective on timing and progress, Step #3 will typically take an hour or two to complete in the sense that you will feel your child is really "getting it" as a result of the repetition. If it is taking longer than two hours, however, DO NOT become frustrated as getting through all the steps in the course correction can take 12+ hours with some children.
While repeating Step #1 and Step #2, you will also want to guide your child perform "dry pants checks" on himself or herself every five minutes or so to reinforce the importance of being dry—perform these checks at the same time you are having your child check the doll's pants.
TRAINING TOOLKIT
"Potty Pals"
This is another powerful tool we introduced earlier in our guide but are highlighting again here given its effectiveness with teaching children who are struggling to learn potty training tasks. Specifically, you'll want to invoke your child's "Potty Pals" throughout this Course Correction (1) to tell your child how proud specific "Potty Pals" will be of him or her when a potty training action is completed and (2) to demonstrate correct potty training actions through the use of a "question and answer" format.
#4For STEP #4, you are going to have your child enact (with your assistance) what he or she just taught the doll during Steps #1 and #2 and then really mastered during Step #3. The goal is for your child to successfully use the potty chair—at first with your assistance and then more and more independently following his or her first "self-initiation."
Start by giving your child some fluids, just like you did at the beginning of Day ONE with our "standard plan." This is to stimulate the need to urinate. As an added bonus it will also give your child time to reset after going through Steps #1, #2 and #3 (we are talking approximately 15 or 20 minutes to consume the drink and wait for the need to urinate).
Now, prompt (really "instruct") your child to go to the bathroom. Tell him or her to take all of the steps that you just did with the doll—including walking to the potty chair, pulling down his or her pants, sitting on the potty chair and, if he or she goes to the bathroom, emptying the contents of the potty chair and finally flushing them down the toilet. Your child should have a fairly firm grasp of how to do all of this as a result of having taught the doll to perform these actions.
Because the goal is to have your child successfully "go" on the potty chair, you should have him or her sit on the toilet for approximately ten minutes. You should also provide ample praise after each successful step your child takes, and especially when he or she successfully urinates in the potty chair.
Repeat this entire process every 15 minutes or so. After your child has successfully urinated in the potty chair, you can cut down on the length of the potty sits to around five minutes. If your child sits on the potty chair without being prompted, do not interfere by setting a time to sit (let your child determine on his or her own in this case), but do offer praise and let him or her know how proud you are for them "using the potty all by himself / herself, just like a big boy / girl."
In between those times when your child is sitting on the potty chair (i.e. enacting what he or she learned by teaching the doll in Step #1), have your child perform dry pants checks on himself or herself (i.e. enact what he or she learned by teaching the doll in Step #2). At first, continue to have your child perform these dry pants checks place every five minutes—after your child's first "self-initiation” (i.e. goes over to the potty chair and pees unprompted), start spacing out the “dry pants checks” (to seven or so minutes, then ten and finally fifteen minutes apart).
Over the course of a few hours (but potentially longer), your child will experience more self initiations and you will find him or her staying dry. As your child gets better and better at using the potty chair, begin to praise only when he or she has completed going to the potty and emptied the pot. As more hours pass and your child continues to get a better grasp on the process and what is expected of him or her, begin instructing them less and simply watching, only to step in if they falter. You can also begin to reintroduce the distractions you cleared out to start training, such as your child's toys, so that you can teach your child the importance of setting aside these activities / objects in order to use the restroom.
Once your child has had a few successful self initiations, you can also start spacing out the dry pants checks even further (i.e. about once an hour). Continue giving prompts when you see your child exhibits his or her potty signs and during those times when his or her potty schedule indicates it's likely time to go, but leave it up to them to use the potty chair. A good suggestive prompt that will allow you to further make this process "theirs" is have your child perform a dry pants check on himself or herself and to leave it up to them to go to the potty chair. Essentially, you will begin backing off more and more, as was the case with the potty sits.
TRAINING TOOLKIT
"Staying Calm"
Being calm on the potty chair will help your child achieve the relaxation necessary for urination and bowel movements. For this reason, whenever your child is sitting quietly and without moving on the potty chair, verbalize this action and offer praise (e.g. "you are being such a good boy / girl by sitting still on the potty chair."). After that, keep yourself quiet so that you won't distract your child's relaxed state. If he or she breaks their relaxation, encourage them to sit still again.
TRAINING TOOLKIT
"Watching for Pee"
When your child is sitting on the potty chair, pay VERY close attention and provide your child with praise as soon as he or she begins to urinate or have a bowel movement. By this we mean “mid-stream” (at least in the case of urine). Praising your child while he or she in the middle of the act will cause your child to associate the praise with the act of going and the feelings associated with elimination. Once your child is starting to "get it" you can have him or her tell you when they are going so that you can let your guard down a bit (of course offer praise as soon as they let you know).
TRAINING TOOLKIT
"Accidents"
So what to do when you encounter the inevitable accident during the "Course Correction"? First, remember that accidents are part of the plan and do not get upset. Next, you'll want to take the same actions we detailed in the section above titled "All About Accidents," with a little modification for the final bit (i.e. dig deeper). Specifically, start by verbalizing your displeasure at the state of your child's wet pants (again it's not that you are mad at your child, you just dislike wet pants and urine on the floor). Next, have your child clean up as we previously described. Lastly, instead of looking for the root cause of the accident you will have your child practice going quickly to the toilet. This is to reinforce the accident procedure he or she just taught the doll in Step #2 and will also help your child "connect the dots" with respect to what happens when he or she has an accident.
To do this, take your child to the location where the wetting occurred and tell him or her to “practice finding the potty chair; practice getting there quickly.” Then have your child hurry to the bathroom to sit on the potty chair for a few moments (he or she just went and won’t likely need to go, but may have a bit more "in the tank"). Next take your child to a different location in the house and again practice hurrying to the restroom and sitting on the potty chair. Practice about ten times from various locations in the house (three times from same location where the accident occurred and the rest from different locations around the house). If your child becomes upset or thinks you are mad, explain that you are not mad, love him or her, and that when he or she has an accident it is necessary to practice "just like teddy did."
It's That Easy!
Although your COMPLETE DEDICATED FOCUS is necessary for this "Course Correction" you should move through these four steps quite quickly. As mentioned at the outset, the entire process usually takes around four hours but can take up to a day.
To recap the entire process, in Step #1, you have your child teach the doll how to use the potty chair and also offer your child the chance to emulate what he or she just taught the doll. In Step #2, you have your child teach the doll how to perform a "dry pants check" and how to practice using the potty chair following an accident. For Step #3, you repeat Steps #1 and #2 a couple of times and also have your child perform "dry pants checks" on himself or herself every five minutes. For Step #4, you have your child enact what they taught the doll in Step #1 and Step #2, and then really mastered by repeating everything again and again during Step #3. Specifically, you give your child some additional fluids and then prompt him or her every 15 minutes to sit on the potty chair. In between those prompts, you also have your child perform "dry pants checks" on himself or herself every five minutes.
When your child goes through Steps #1, #2 and #3, you verbalize and provide praise for each completed action your child teaches the doll, no matter how seemingly minor. This is because your goal is to have your child internalize all of the actions that lead up to a completed step. You'll start out Step #4 the same way, verbalizing and offering praising for each completed action. After your child's first few successful "self initiations" you'll scale back the praise and offer it only for the successful completion of "larger" actions, such as for your child using the potty chair all by himself or herself. The goal here to begin fostering your child's ownership of using the potty chair and keeping their pants dry.
All along the way, you'll want to invoke your child's "potty pals" to reinforce the concepts you are trying to teach. You'll also want to be ready to step in and manually instruct your child through an action or step when necessary.
Getting Back on Track
When your child has these steps down, you are back on track and ready to pick-up at Day TWO – In the Afternoon. As an added bonus, your child will already be in loose fitting pants, yay! In fact, your child will already be largely trained—the final skill will be teaching him or her to use the travel potty seat and then reinforcing that the skills he or she learned at home are also to be used outside the home. Do, however, continue have your child perform dry pants checks on himself or herself every 30 minutes to one hour (the dry pants checks aren't otherwise incorporated into our "standard" plan, so you'll want to remind yourself to keep them up).
Quick Click Table of Contents
- Setting Up for Success
- Day ONE: Let's Get Started!
- Day TWO: Keep It Up!
- Day THREE: Going Out!
- All About Accidents
- What About Poop?
- Naps and Night Time Training
- The "Course Correction"
- Odds & Ends

When to Seek Medical Advice
We at One Proud Toddler are not medical professionals and we do not give medical advice. So who should you call if you have a medical-related potty training question? The answer is pretty simple: You should contact your child's doctor whenever you have a medical concern about anything that is potty-training-related. Some common reasons for reaching out to your child's doctor before or during the potty training process include:
- If your child has developmental issues or an underlying medical condition (e.g. diabetes, seizures, etc.).
- If your child has previously undergone surgery involving the bowels or urinary system.
- If your child is constipated.
- If your child experiences pain when pooping or peeing.
- If your child's pee or poop are discolored.
- If your child experiences a sudden and stark regression in potty training and you are unaware of any reason for this (e.g. no recent family trauma, big changes or upsetting events).
The list above is by no means exhaustive. In short, if you think there is a problem go with your gut and contact your child's doctor.
Troubleshooting Techniques for Common Potty Training Issues
| REASON | SOLUTION |
|---|---|
| Refuses to Stop Activity (One Off) | Whether it's playing with a favorite toy or eating a tasty snack, children will often resist prompts when they are involved in an activity. To get around this road block, let your child bring the toy to the bathroom or let your child know the activity will be waiting for them when they return. |
| Refuses to Stop Activity (Persistent) | If your child persistently refuses to respond to prompts because he or she is distracted by other activities, then you, the parent, should lead by example. Do this by showing your child that you give yourself potty breaks even if it isn’t an ideal time and by verbalizing what you are doing (e.g. “Mommy really wants to go to the store right now because it will be fun but I’m not sure if I have to go pee pee. I’ll try quickly before we leave just in case. Let’s go try.”). |
| Asks for a Diaper to "Go" In | First the good news! Your child recognizes the bodily signals associated with going to the bathroom and can hold it. So what gives? This problem often arises because the child is scared of going to the bathroom. To solve this, explain that you know peeing / pooping on the potty chair can be scary but you will go with him or her. It also doesn't hurt to enlist a stuffed animal (place it on the potty chair or toilet, flush and show how it "survived" just fine). |
| Says Doesn't Have to Go But Clearly Does | This means your child either doesn't want to stop an activity, is scared of the toilet or needs some privacy. We've already detailed what to do if a toy or activity is in the way. If you think your child is scared of the potty chair, then handle it the same way as if he or she were asking for a diaper to "go" in. Lastly, if you think it might be because your child needs some privacy, try backing off a bit. |
| Getting Annoyed at Prompts | This is a sign that you are over prompting or generally hovering a bit too much over your child. If you experience this during Day ONE, back off a little bit. If you experience this on Day TWO and it feels like your child is "getting it," then consider transitioning to "reminder" style prompts. |
| Won't Sit on the Potty Chair | Start out by playing games and singing songs while your child is sitting on the potty chair. If this doesn't work, try bringing a small desk and setting up a play station around the potty chair. As a last resort, consider allowing your child to play with a mobile phone or tablet. We don’t recommend TV because children can become so focused they forget to pay attention to their bodily signals. |
| Throwing Tantrums | Respond to tantrums by first being calm and level headed. Then repeat what you have asked your child to do and use the "Manual Instruction" technique to guide your child through completion of the relevant training activity. The goal is for you to demonstrate to your child that throwing a tantrum will not derail the potty training process. |
Aside from the troubleshooting techniques above, we'd also recommend reading "Our Top 10 'Must Know' Potty Training Tips" for helpful information we wish someone had told us when we started our potty training journey.
How We Developed the Potty Proud Approach
Potty training in the United States is literally like the Wild West. Some programs claim it can be completed in a day, while others say weeks or even months of training are necessary; some claim night time training should wait until after day time training is complete, while still others say it is best to tackle the two at the same time; some say "poop" and "pee" training should be separated, while others scarcely devote any attention to the "BIG NUMBER TWO." The list goes on and on, but we're sure you get the point!
So we at One Proud Toddler set out to make sense of it all. To do this, we started by developing a set of three common sense potty training principles based on child development and parenting principles. We find they're pretty hard to argue with (and we bet you will too even without doing all the research):
Principle I: EARLY IS BETTER
There is a golden window between 20-and-30 months old when children are physically and behaviorally ready for training. You can read all about this topic in our blog post "Why Early Potty Training is Better Potty Training."
Principle II: YOU ARE THE ADULT
We don’t rely on our toddlers to tell us when they should be going to bed, whether they're ready for school or if they should sit in a car seat—there is no reason potty training should be any different. Duh!
Principle III: FOCUS AND CONSISTENCY ARE KEY
Everyone knows practice makes perfect. Everyone also intuitively knows that focused, consistent practice makes perfect faster!
Next, we researched the different potty training methods out there and honed in on those approaches that either really make sense (most don't) or have some sort of scientific backing (even fewer).
Long story short is that all of this research led us to develop a training plan that draws upon concepts found in the "bare bottom method" and is further supplemented with techniques from the "fast track method." We call this training method the Potty Proud Approach and like it because it calls for early training, is adult led and focused in duration to allow for consistency—in short, it lets us stick to our principles.
We Like the Bare Bottom Method Because . . .
We think it does the best job of all the approaches we've researched of helping children to “connect the dots” between their bodily processes and the feelings associated with those processes. Specifically, by removing the child's diapers and clothes at the start of the training process, this training approach causes the child to naturally heighten their focus on “the mechanics of elimination” and to immediately see and feel the results. Because of this HUGE benefit, we recommend waiting until the afternoon of Day ONE or morning of Day TWO before trying the "Course Correction" detailed in this guide.
We Like the Fast Track Method Because . . .
This is the only training approach we've encountered whose claims of effectiveness appear to be supported by some sort scientific study. The technique was developed in the early 70's, though, so we've modified it to get rid of the reliance on punishments and external rewards. We don't start directly with this method because we prefer the more natural learning style associated with the bare bottom method and believe in the benefits of having children start the potty training process naked. That being said, this is a method for training children fast and we've included elements of it in our "Course Correction" for parents who are training on a tight timeline.
Quick Click Table of Contents
- Setting Up for Success
- Day ONE: Let's Get Started!
- Day TWO: Keep It Up!
- Day THREE: Going Out!
- All About Accidents
- What About Poop?
- Naps and Night Time Training
- The "Course Correction"
- Odds & Ends
More Interesting Reads

The Daycare (or Preschool) Handoff
Potty training at home is only half the battle if you'll be handing you child over to daycare or preschool. Read our 'easy peasy' 3-step guide to getting the transition right!

The Potty Training 'Reboot'
While we're not huge fans of stopping the potty training process, there are situations when a training 'reboot' is necessary. Learn when a break may be a good idea and how to go about taking one.
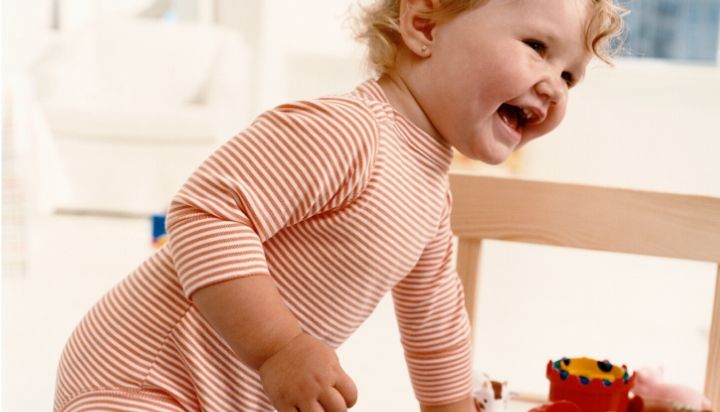
Making Sense of DIfferent Potty Training Methods
Potty training looks complicated, but the truth is all the methods out there can be broken down into six easy-to-understand categories. Let us help make sense of the madness.